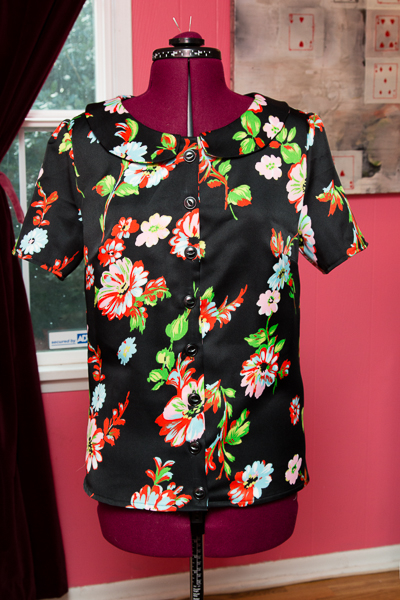
This Colette Patterns Violet blouse was originally to be made for the Colette Patterns 2012 Spring & Summer Palette Challenge. It was in my moodboard and everything!
I’m usually really good about finishing one project before starting another, because I know how I am. If I didn’t force myself to work that way, I would have half-completed projects all over the place. It’s part of how I motivate myself to finish things.
The Violet blouse was one of three garments I pledged to make in the Spring and Summer of 2012. The other two were a Truffle dress (the third project in the The Colette Sewing Handbook) and a Crepe dress. I completed my Truffle dress without any problems, but was held up by the intensive lining of my Crepe dress, so that it wouldn’t be see through. I can’t remember what happened after that. Summer ended or I gave up or got distracted by other projects, because the Violet pattern sat uncut until the following Spring, when I finally cut out the pattern and made a muslin.
The Violet blouse is designed to be loose and boxy, but I wanted it fitted, so I knew going in that this blouse would require some alterations. Since the fabric I had picked out for it was a vintage fabric*, and I didn’t have much of it, I really wanted to get it right. Then the holidays happened and I started making oven mitts and potholders and stuff for sales, so I completely forgot about it again for almost another year.
I noticed the muslin in the background of my WIP: Miette post and realized it was time to finish this puppy once and for all. Now that I have bored you all to tears, with my excuses as to why this blouse took me two years to make, let’s get to the details of how I made it and how it turned out!
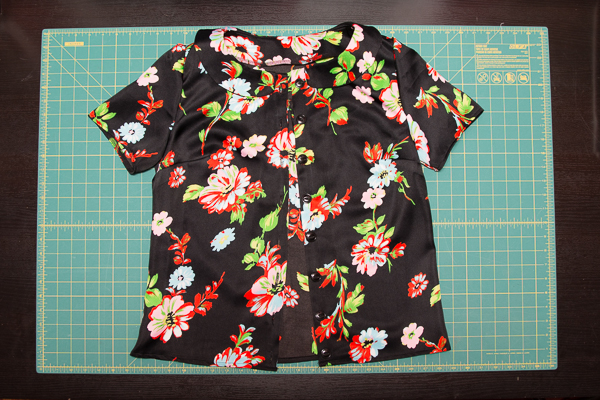
Let’s talk adjustments to the pattern first. I followed the instructions in the Colette Sewing Handbook for all the adjustments I made. To make the blouse more fitted, I removed 3/4 of an inch of width from the front and back pattern pieces, by doing a pivot alteration for a small waist. I added an inch to the bust darts, making them longer and therefore landing in the right place. I also added about an inch to the length.
I ripped my first muslin apart and re-fit it with the adjustments I made to the pattern. Everything was great, but the back poofed out, so I did a sway-back adjustment of about 1 inch. This seemed to work, so it was go time on cutting the fabric!
This blouse was a lot of firsts for me; first time working with a slippery fabric, first time setting sleeves and making something with buttons. I didn’t have too much trouble with the sleeves, but there was definitely a learning curve with the fabric and the buttons.
I learned quickly (luckily before I did too much damage) that slippery fabric should be cut in a single layer, as it moves way too much when folded. I also forgot that I had spray stabilizer I could have used, but this fabric seemed to cut fine in a single layer, so I probably didn’t need it anyway.
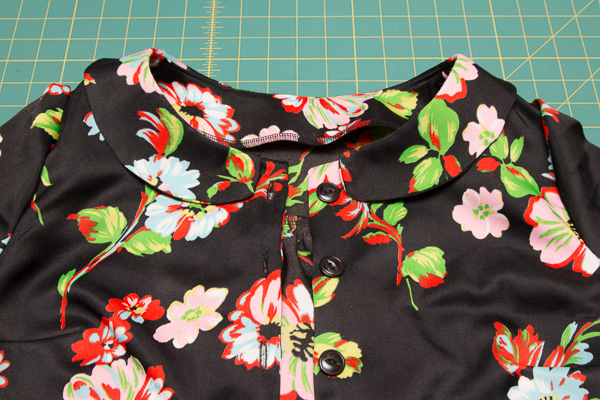
It was the first time I had used the automatic buttonholer on my machine, so it took me some practice runs to get it working. I am so glad I got a machine that does that. They aren’t perfectly even or consistent, so I might go in later and hand sew some reinforcement stitches. As a result, I didn’t follow the pattern markings to sew on the buttons. I basically just marked a line in chalk on the button side, where the placate should fall, so it would be straight, and then ran the chalk through the button-hole to mark where I should sew the button. That worked fine and everything lays straight, so you would have to look close to notice that the buttonholes aren’t totally lined up.
I had originally planned for red buttons, but after seeing the blouse take shape, I thought red would drawn attention from the fabric too much and be too busy, so I went for simple black buttons instead. I am so glad I did.
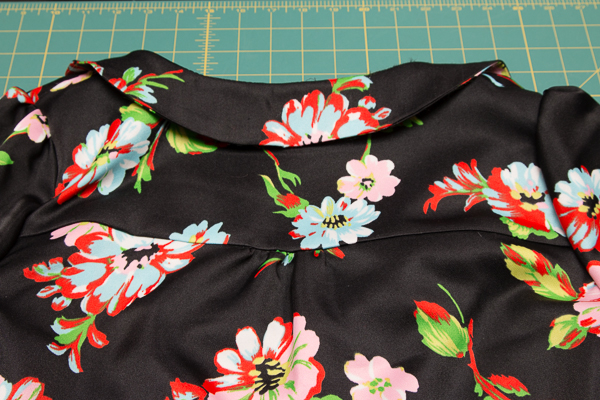
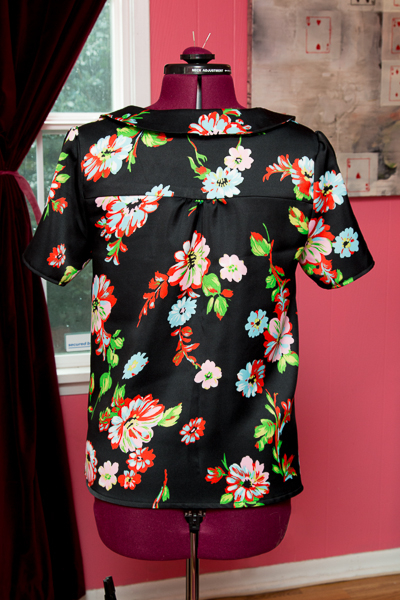
I’m really happy with how the collar turned out. I spent a lot of time pressing it to get it to lay flat. It was worth it to do that, because I think it looks nice and finished now. I was worried about how the slippery fabric would do with the gathers on the back, but I think they turned out alright as well!
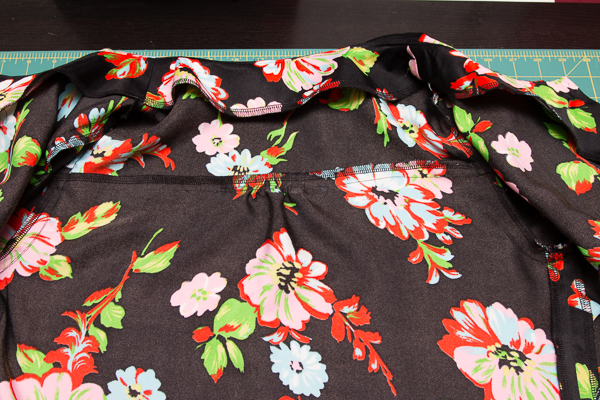
My serger and I have been getting along famously these days and the insides of my handmade garments are finally starting to look like they should. I just had to adjust my serger for the stretchiness of the fabric. I played with the settings and ran scrap fabric through it, until it was sewing flat, and then it was smooth sailing from there.
After all that, how is the fit you ask? See for yourself! I am pretty pleased.
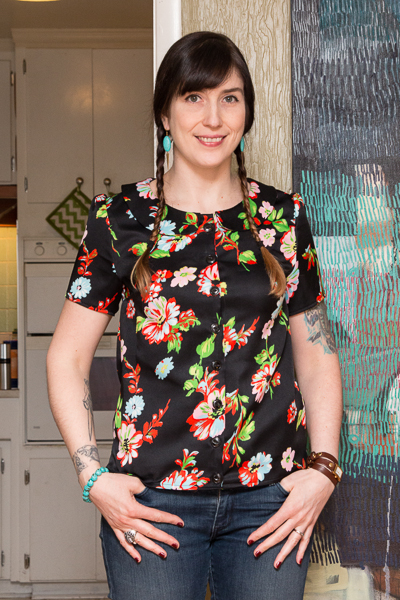
I should have started the buttons a little higher, because the top button looks a little low to me, and so does the bottom button, but that is totally a nit-picky thing.
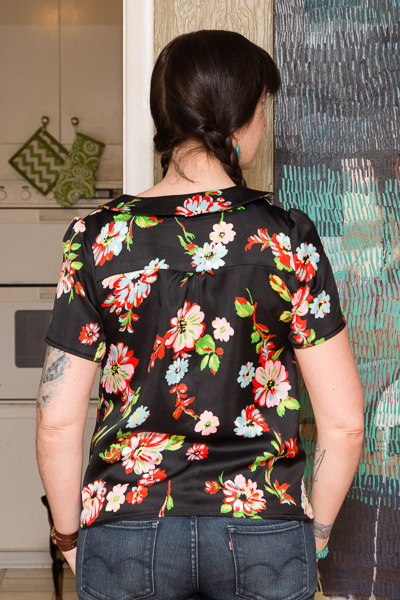
I like the puff of the sleeves, the way the back has a yoke and gathers and the way the back lays. I got rid of the poofy back, so that is a win!
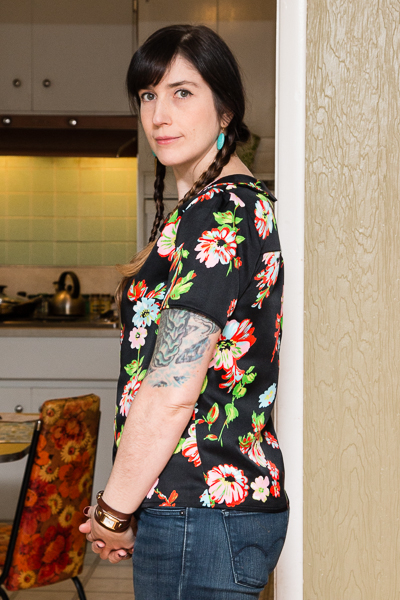
I loved this fabric when I bought it and it totally delivered. I think it made for a great blouse and is super comfy to wear. I think I finally made something I will actually wear!
*I refer only to the fabric as a vintage fabric, because honestly I don’t know what it is. I bought it on Etsy and the description said it was “a 60s style back satiny fabric, possibly a polyester nylon blend”. My co-worker Lauren says it’s just polyester, but it is so silky and soft to the touch. I was really hoping it was some sort of silk blend. Is there such a thing as a silk polyester blend?
Also, it isn’t very thin, so maybe that is the give away that it is just polyester. Beside the edges that wanted to fray, working with it was a lot like sewing a knit fabric (in weight and stretch). Anyway, if anyone can identify this fabric I would love to know what it is!

4 thoughts on “Finished Project: Colette Violet Blouse”